Lunch
|
Select "Lunch" on the left navigational menu, then select "Class".
|
|
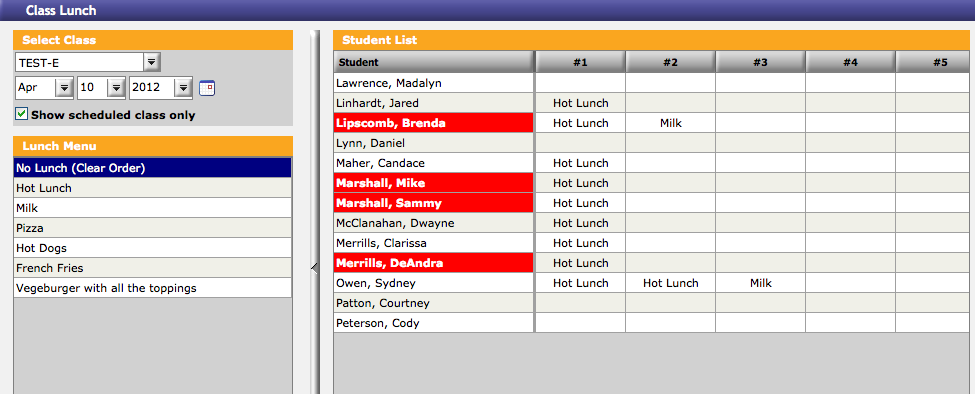
There are only 3 categories on the lunch screen.
(1) "Select Class" - (Top Left) Choose today's date or a date in the future
(2) "Lunch Menu" - (Bottom Left) Contains all the items that are available for the students
(3) "Student List" - (Right side of the screen) All the students in your class are in this category. The students that are highlighted red are absent.
To take lunch, you'll select a lunch menu item (lower left) and then select the row for the student that is getting that item. You can only put one item in each column for a particular student. There are 10 columns for each student. If the lunch items are already filled in for a student, then that mean their parent has already selected their lunch for the day. You can take lunch orders for days in the future.